Alysha Yoder Photography
Capturing Moments. Making Memories.
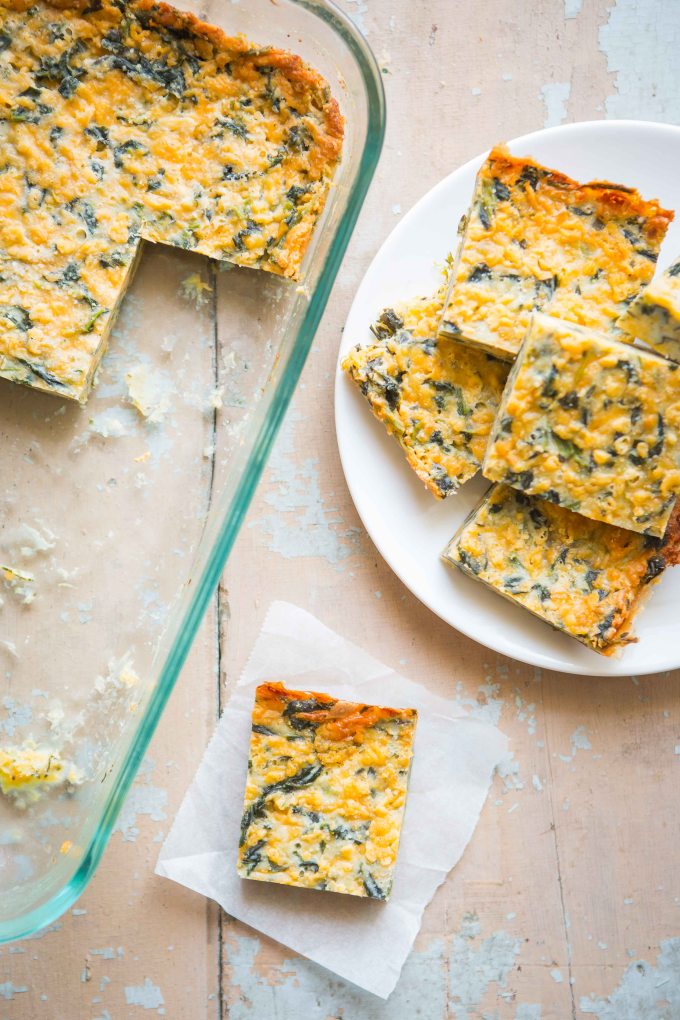
Cheesy Spinach Squares
Posted on April 26, 2016
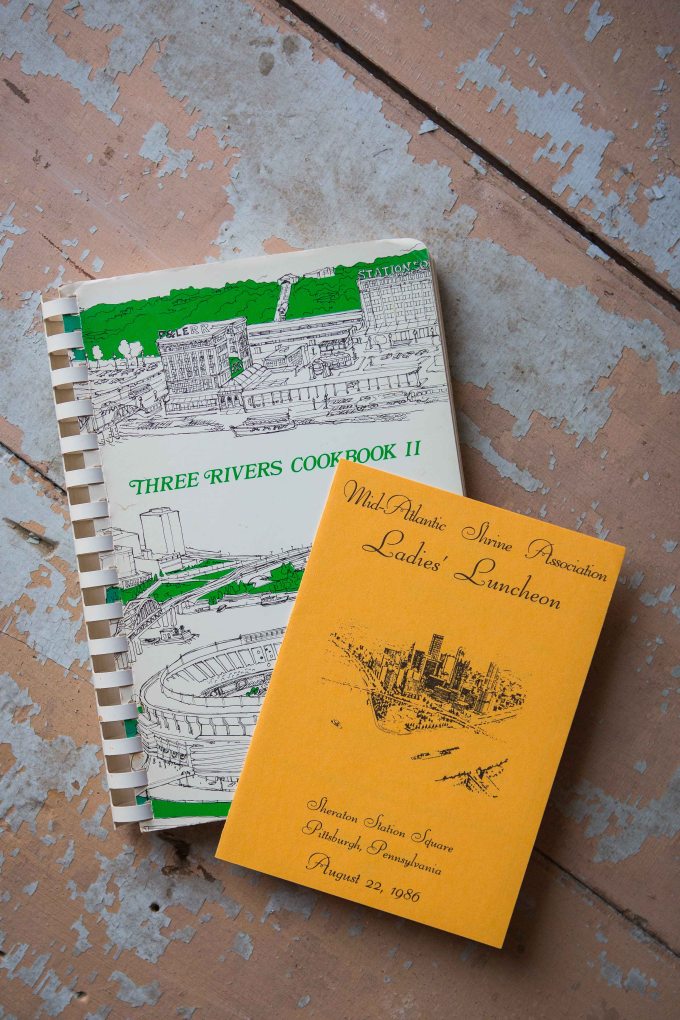
Onto another one of Gram’s cook books. This time, it was one she happened to have a few of her own recipes in. I’m fairly certain that it somehow was connected to The Shriners. Both my grandfather (an actual Shriner, who also dressed up as a clown for many of their parades) and grams were involved in the Shrine. I mean, she still has ticket stubs to the ‘ladies luncheon’ she attended as a book marker… leave it to grams to keep something from 1986 haha.
Delving through the treasure trove of cookbooks grandma left me is pretty fun. It’s like a treasure hunt every weekend… looking for a new recipe that’s sucks me in. This one is no exception.
Now, for those that know me, they know I’m a HUGE cook. I’m always cooking and I’ve tried to recreate, remake, and frankly…. all around experiment with just about any food I come across. This recipe is a first for me. Seriously…. something I have never eaten or seen a recipe for. This is like a combo of a strata… cheese bread… and appetizer. It’s definitely unique and delicious. The recipe is called Spinach Cheese Squares and it’s from Mrs. John Carter.

Now just to be honest, I messed up and mistakingly only got one package of spinach to make this. In reality, I think that it is better with the one package. But feel free to use two packages. I also snuck in some garlic and onion powder to give it a little more flavor (and garlic makes everything better… duh) and I’m telling you… this is really good. You could also totally add in some chopped onions or sautéed mushrooms if you’re feeling crazy. I think either would be a winner. In reality, I don’t even know what I’d classify this as. It could be an appetizer, but you could also serve it as a side. Heck, if you’re not too hungry, it could be the main course. So without further ado, I give you…. drum rolllll… Spinach Cheese Squares.
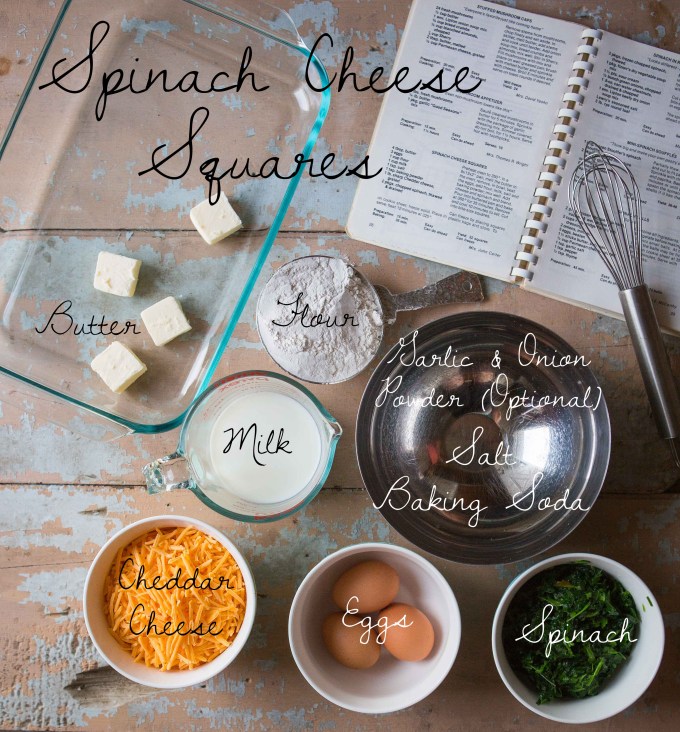
Spinach Cheese Squares:
- 4 T butter
- 3 eggs
- 1 cup flour
- 1 cup milk
- 1 tsp salt (we added a little more, but this is more to taste)
- 1 tsp baking powder
- 1 lb sharp Cheddar cheese, shredded
- 1 or 2 pkgs chopped spinach (depending on your love of spinach), thawed and drained
- 1 tsp of garlic and/or onion powder (optional)
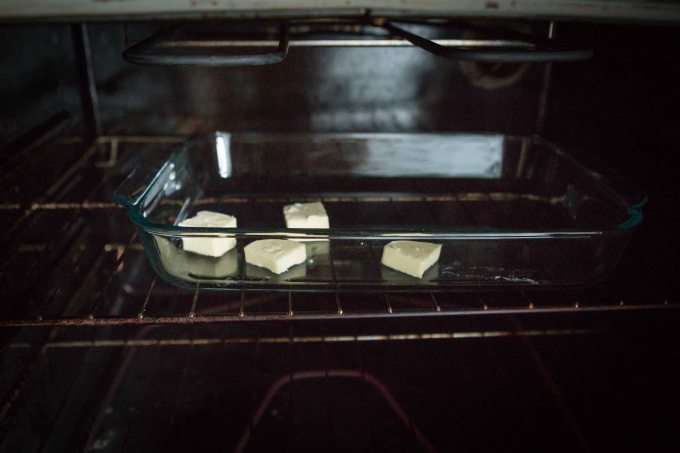
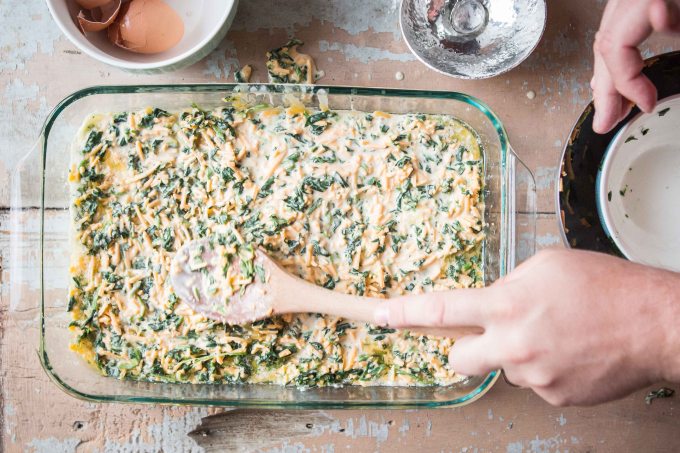
First, make sure to pull out spinach to thaw. Preheat oven to 350°. In a 9×13 pan, melt butter in oven and remove. In a bowl, beat eggs, add flour, milk, salt, baking powder, and optional garlic/onion powder. Mix well. Drain spinach well. I find the easiest way to do this is with a dish cloth. Place spinach in the center, roll cloth around the spinach and squeeze until most of the liquid has been removed. Slowly add cheese and spinach, and make sure they are blending well. Pour mixture into buttered pan, spread evenly. Bake in oven at 350° for 35 minutes. Remove and cool 10 minutes to set. Cut into bite sized squares and enjoy! The hubs and I both agreed this was better warm. This also keeps in the fridge quite well and is easy to reheat. You’ll thank me later. This seems to be a good ‘veggie hiding’ recipe for kids too!


*For more info on the health benefits of spinach check out Helen’s article here!
Photography and writing by:
(b) www.alyshayoderphotoblog.com ![]() www.alyshayoderphoto.com
www.alyshayoderphoto.com
(e) alyshayoderphoto@yahoo.com (p) 610.762.7810
Strawberries and Cream
Posted on March 14, 2016
It’s curious, every time I sit down to write out a recipe, I spend a little time thinking about what grams would say. What memories would she remember about these recipes that I don’t? How did she create or find a recipe? I would say a good half of all the recipes in gram’s books are from friends, relatives, or other cookbooks and this one is no different. It’s on an old piece of type paper from 1978 from her friend Shirley MacKay. Gram’s binders are filled with torn out pages from magazines, recipe cards ‘from the kitchen of’ various friends, or jotted down notes from a restaurant she’d visited where she convinced a chef to share the recipe with her. Grams was funny like that. She could pretty much talk anyone into giving her a good recipe.
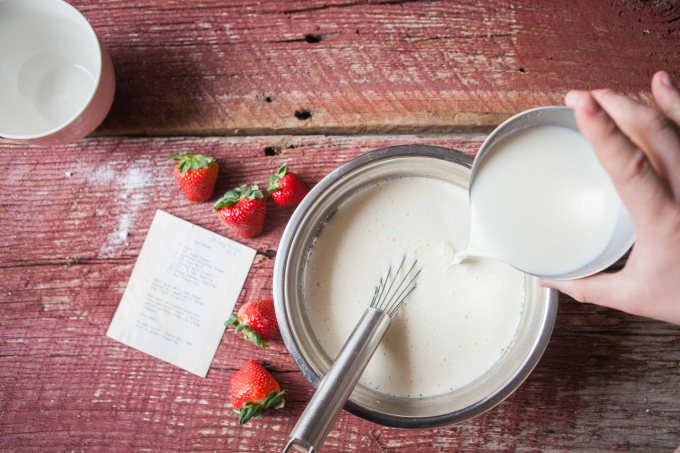
Today, with the dreary rain and all around blah mood, I couldn’t ask for a better day to make ice cream, right? Perfect comfort food (other than pizza of course). Now two things. One, this ice cream recipe is actually a ‘vanilla base.’I chose to make strawberry ice cream, as it’s one of my favorites and the berries at the store looked great. I can’t wait until summer when I can mix and match all sorts of fresh fruit. You could hypothetically add just about anything to this recipe though. For example:
- Crushed up cookies = Cookies and cream
- Almond extract and toasted pecans = Toast’y nuts
- Coconut, crushed almonds & chocolate = Almond Joy
- Blueberries and Lemons = Summer Fresh
- Cookie dough and caramel = Serious awesomeness
It’s a great recipe for kids to experiment with different flavors too. And heck, if you’re just a HUGE vanilla ice cream fan (like my husband), feel free to keep it as is. You could even scrape some vanilla beans in it to give it a little extra boast.
Two, I received these hand-made pewter spoons that I’ve been oogling over for a while from a little Etsy shop CrosbyandTaylor. They’re just so stunning and have just the perfect rustic look I wanted. Seriously, isn’t this the most fantastic set? I love them. I couldn’t wait to photograph them this weekend.


Now, if this is your first time making ice cream at home, you should know that it’s not going to come out super firm and scoopable like the gallons you get at the store. Homemade ice cream is like soft serve. It’s freaking delicious, but if you’re looking for some hard scoopable ice cream, this is not what you’re looking for. You can also get it to the “soft serve consistency” and put it in the freezer if you’re a fan of the very scoop-able.
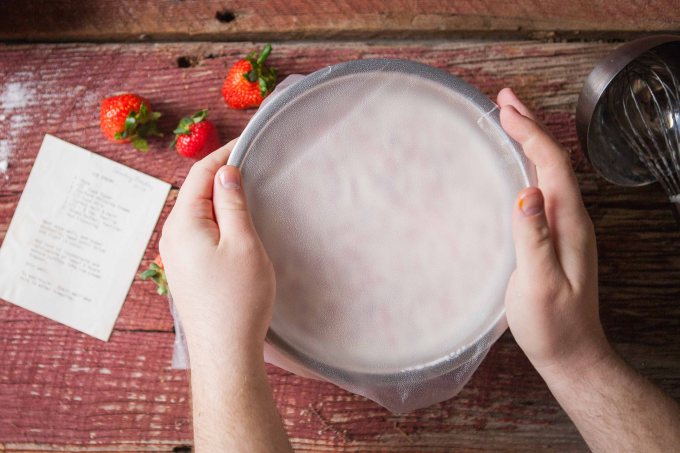
This is a fairly easy recipe in the sense that it’s a matter of mixing everything in a bowl. Ice cream recipes however are a little time consuming in the ‘waiting’ process. After everything is mixed, you will have to refrigerate for 2+ hours. Then place the mixture into the ice cream maker for around 20 minutes. Depending on if you have an ice cream maker or not, it might take longer (for my purposes below, I used my ice cream maker). If you don’t have one however, you can use a 1 lb coffee can and a 3 lb coffee can. This was not the method I used, but you can find a good little tutorial here (Ice Cream Can Method).
Now…. I know you’ve been anxiously awaiting this ice cream recipe, so without further ado, STRAWBERRY ICE CREAM (you know you’re just as excited as I am).
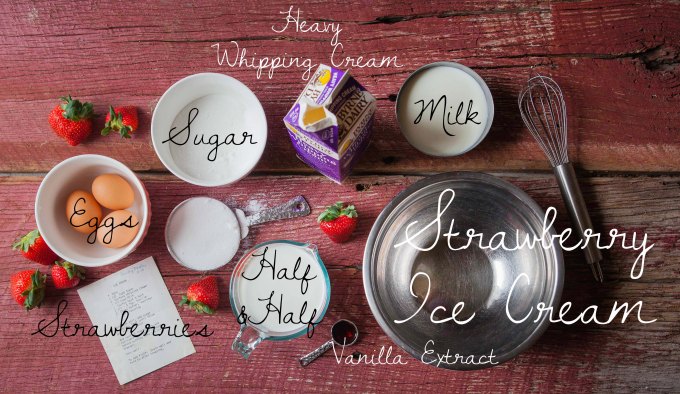
Vanilla Ice Cream Base:
**First place ice cream maker base in freeze overnight. It MUST be VERY cold and frozen before it will make ice cream.
- 3 eggs
- 1.5 cups white sugar
- 2 half pint cartons of heavy whipping cream (or 2 cups)
- 1.5 cups milk
- 1 pint carton of half and half (or 2 cups)
- 2.5-3 T of vanilla extract
- Optional – 1 to 1.5 cups finely chopped Strawberries
- Optional – 2 drop vanilla-nut flavoring
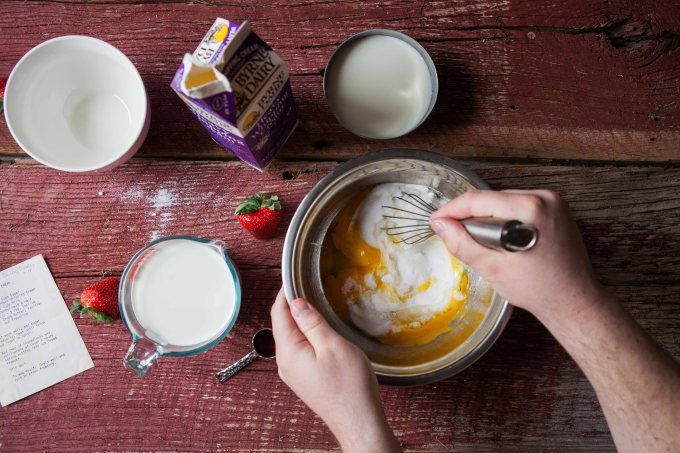
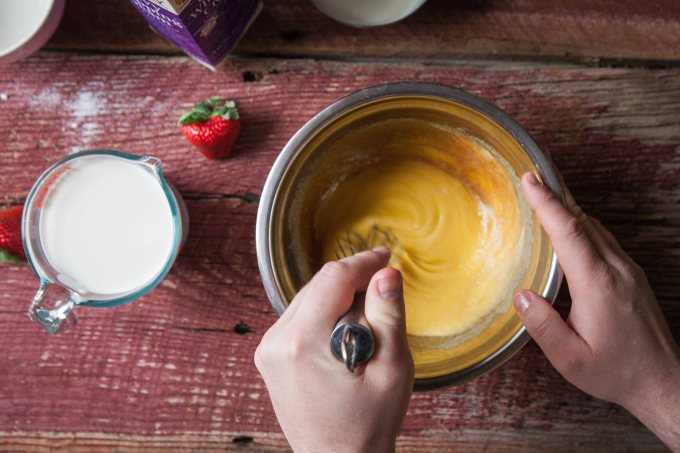
Beat eggs well. I also remove the little white ropes called the chalazae. They gross me out if I get a little white chunk in my ice cream. But for a little cooking trivia, the chalazae is what anchors the yolk to the egg shell and prevents it from bouncing around in there. Gradually add sugar and whisk until smooth and creamy. Slowly stir in remaining ingredients. Stir well until combined. Place in covered bowl in the fridge for 2+ hours. Once very cold, slowly pour into ice cream maker base. Be careful not to overflow. All ice cream makers are different so you may have some mixture left over. If so, just eat what’s frozen and add more. Enjoy!
**Also, two notes. First, a money saving note. If you have a membership to any club stores (Costco, BJ, Sam’s, etc.) get the half & half and whipping cream there. It is TREMENDOUSLY cheaper. Second, some people really don’t like cooking with raw eggs. To each their own. This can also be made in a sauce pan over the stove. Whisk it all together and continuously stir until boiling. Remove from heat and cool in fridge. This will take a LOT longer to cool for the ice cream machine but just gives you another option.


Alysha Yoder Photography (b) www.alyshayoderphotoblog.com
![]() www.alyshayoderphoto.com (e) alyshayoderphoto@yahoo.com (p) 610.762.7810
www.alyshayoderphoto.com (e) alyshayoderphoto@yahoo.com (p) 610.762.7810
Popular Now


