Alysha Yoder Photography
Capturing Moments. Making Memories.
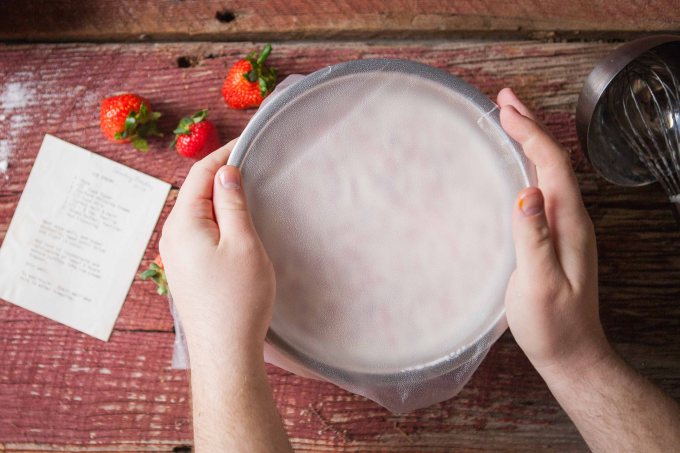
Strawberries and Cream
Posted on March 14, 2016
It’s curious, every time I sit down to write out a recipe, I spend a little time thinking about what grams would say. What memories would she remember about these recipes that I don’t? How did she create or find a recipe? I would say a good half of all the recipes in gram’s books are from friends, relatives, or other cookbooks and this one is no different. It’s on an old piece of type paper from 1978 from her friend Shirley MacKay. Gram’s binders are filled with torn out pages from magazines, recipe cards ‘from the kitchen of’ various friends, or jotted down notes from a restaurant she’d visited where she convinced a chef to share the recipe with her. Grams was funny like that. She could pretty much talk anyone into giving her a good recipe.
Today, with the dreary rain and all around blah mood, I couldn’t ask for a better day to make ice cream, right? Perfect comfort food (other than pizza of course). Now two things. One, this ice cream recipe is actually a ‘vanilla base.’I chose to make strawberry ice cream, as it’s one of my favorites and the berries at the store looked great. I can’t wait until summer when I can mix and match all sorts of fresh fruit. You could hypothetically add just about anything to this recipe though. For example:
- Crushed up cookies = Cookies and cream
- Almond extract and toasted pecans = Toast’y nuts
- Coconut, crushed almonds & chocolate = Almond Joy
- Blueberries and Lemons = Summer Fresh
- Cookie dough and caramel = Serious awesomeness
It’s a great recipe for kids to experiment with different flavors too. And heck, if you’re just a HUGE vanilla ice cream fan (like my husband), feel free to keep it as is. You could even scrape some vanilla beans in it to give it a little extra boast.
Two, I received these hand-made pewter spoons that I’ve been oogling over for a while from a little Etsy shop CrosbyandTaylor. They’re just so stunning and have just the perfect rustic look I wanted. Seriously, isn’t this the most fantastic set? I love them. I couldn’t wait to photograph them this weekend.


Now, if this is your first time making ice cream at home, you should know that it’s not going to come out super firm and scoopable like the gallons you get at the store. Homemade ice cream is like soft serve. It’s freaking delicious, but if you’re looking for some hard scoopable ice cream, this is not what you’re looking for. You can also get it to the “soft serve consistency” and put it in the freezer if you’re a fan of the very scoop-able.
This is a fairly easy recipe in the sense that it’s a matter of mixing everything in a bowl. Ice cream recipes however are a little time consuming in the ‘waiting’ process. After everything is mixed, you will have to refrigerate for 2+ hours. Then place the mixture into the ice cream maker for around 20 minutes. Depending on if you have an ice cream maker or not, it might take longer (for my purposes below, I used my ice cream maker). If you don’t have one however, you can use a 1 lb coffee can and a 3 lb coffee can. This was not the method I used, but you can find a good little tutorial here (Ice Cream Can Method).
Now…. I know you’ve been anxiously awaiting this ice cream recipe, so without further ado, STRAWBERRY ICE CREAM (you know you’re just as excited as I am).
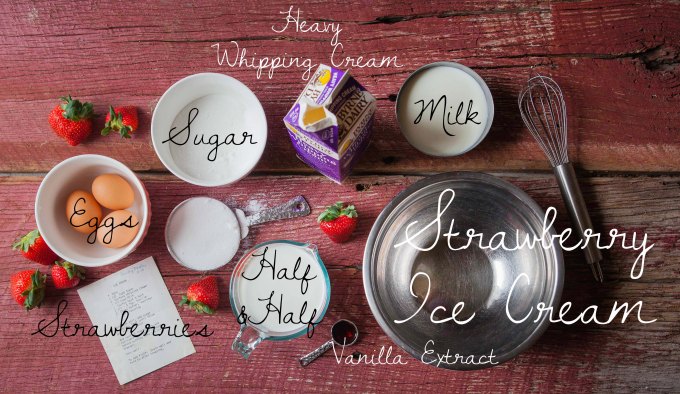
Vanilla Ice Cream Base:
**First place ice cream maker base in freeze overnight. It MUST be VERY cold and frozen before it will make ice cream.
- 3 eggs
- 1.5 cups white sugar
- 2 half pint cartons of heavy whipping cream (or 2 cups)
- 1.5 cups milk
- 1 pint carton of half and half (or 2 cups)
- 2.5-3 T of vanilla extract
- Optional – 1 to 1.5 cups finely chopped Strawberries
- Optional – 2 drop vanilla-nut flavoring
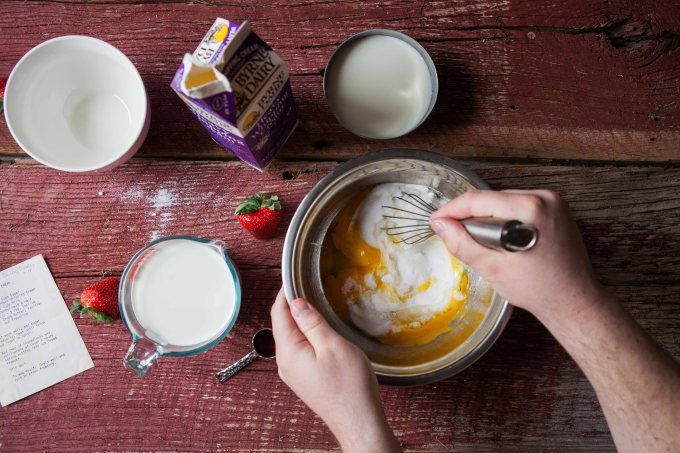
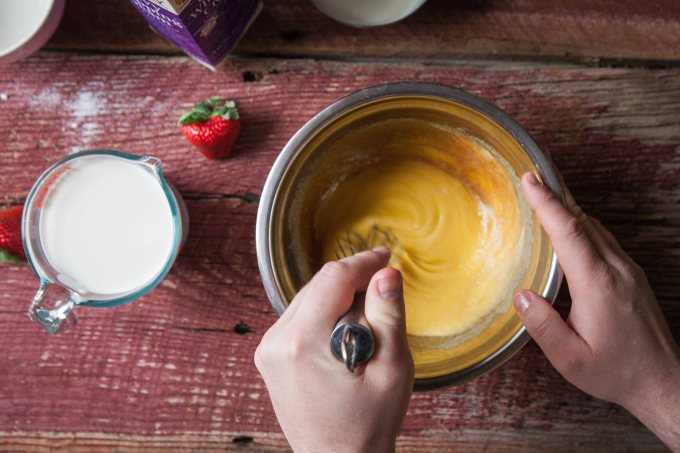
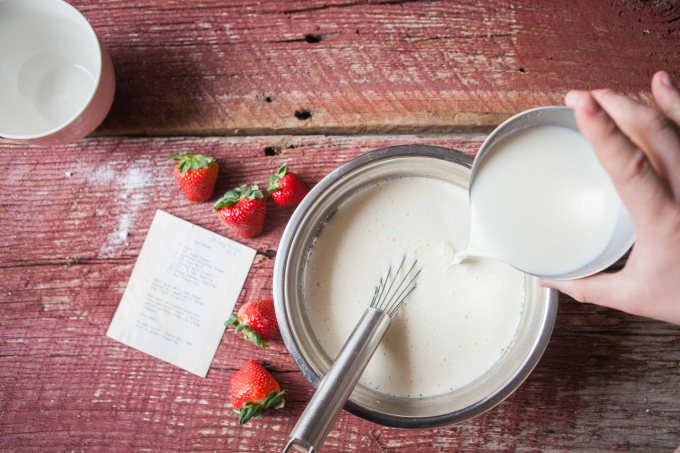
Beat eggs well. I also remove the little white ropes called the chalazae. They gross me out if I get a little white chunk in my ice cream. But for a little cooking trivia, the chalazae is what anchors the yolk to the egg shell and prevents it from bouncing around in there. Gradually add sugar and whisk until smooth and creamy. Slowly stir in remaining ingredients. Stir well until combined. Place in covered bowl in the fridge for 2+ hours. Once very cold, slowly pour into ice cream maker base. Be careful not to overflow. All ice cream makers are different so you may have some mixture left over. If so, just eat what’s frozen and add more. Enjoy!
**Also, two notes. First, a money saving note. If you have a membership to any club stores (Costco, BJ, Sam’s, etc.) get the half & half and whipping cream there. It is TREMENDOUSLY cheaper. Second, some people really don’t like cooking with raw eggs. To each their own. This can also be made in a sauce pan over the stove. Whisk it all together and continuously stir until boiling. Remove from heat and cool in fridge. This will take a LOT longer to cool for the ice cream machine but just gives you another option.


Alysha Yoder Photography (b) www.alyshayoderphotoblog.com
![]() www.alyshayoderphoto.com (e) alyshayoderphoto@yahoo.com (p) 610.762.7810
www.alyshayoderphoto.com (e) alyshayoderphoto@yahoo.com (p) 610.762.7810
White Peaks and Zest
Posted on March 6, 2016
Man… I have had a craving for something like this recipe for a long time. Plus, I picked up these AWESOME bowls at Costco this weekend and I couldn’t wait to get them home to photograph. It looks like I had someone make them for me. But between you and I, this will be our little secret as to where they were purchased from. I’m thinking an ice cream recipe will have to be in the making for next week. And yes, solely because of these dishes. Don’t judge. I’ve photographed things before based around an entire found object. I have this lovely old used “made in Vermont stamped” cutting board I found at Roots Farmer’s Market. It has all these wonderful knife marks and wear and tear. Props are a very important part of the business and finding little beauties like these just make my day 🙂

As many of you know, gram’s was literally involved in EVERYTHING. From volunteer work, to bakeoffs, to fundraisers, she was there. Even from a young age, this was true. A few of the books that I inherited from her were various cookbooks that she had worked with, her mother worked with, they were in, or they’d helped to get published. This was one from her mother’s young days growing up in Vandergrift, PA. Her church put together this fantastic cookbook. It’s from 1923 and the front has a little handwritten “Barclay” in it (my gram’s maiden name). Now the recipe I’m doing today isn’t gram’s or my great gram’s (it comes from Mrs. W. W. Poorman, thank you!), howwwever, it was from a book that the family helped get published to raise money for her church, so I think it counts. Plus, this book is a treasure trove of old school recipes. There is one in it for squirrel. Seriously. I’m not lying. Freaking squirrel. And no, I’m never going to go out and butcher a squirrel for this blog, but that was a surprise.


Anyone who knows me, knows I have a soft spot for what I consider “PA Dutch Recipes,” if the last name Yoder didn’t give you a clue lol. I’m pretty sure the love for PA Dutch food runs through my veins. You wait till New Year’s, and there will definitely be pork, kielbasa, and sauerkraut recipes up on here.
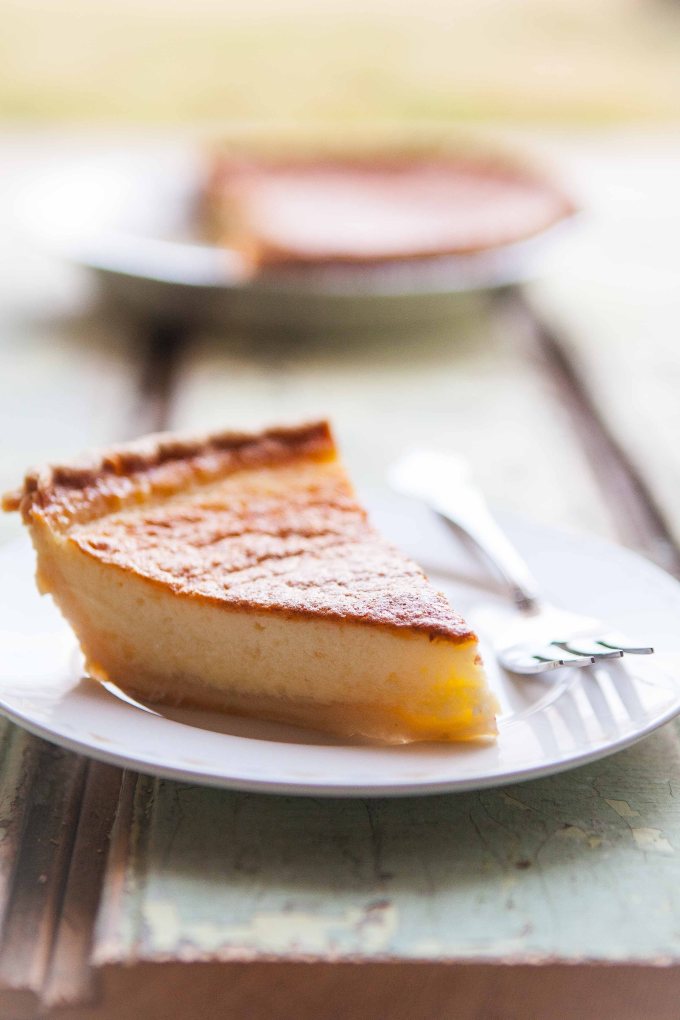
There is a farmer’s stand about 3 miles from my house where Mennonite ladies lay out their fares of assorted homemade pies, breads, and jams. Lemon sponge pie is always among their wares. It’s where I was first introduced to this sweet treat and man, I LOVE lemon sponge pie. With the whipped peaks of egg whites and lemon zest, it’s like springy freshness all in one delicious pastry. Whenever I go pick up some veggies from our farmer’s stand, I always save a little room for one of those sponge pies. When I came across not one, BUT TWO lemon sponge pie recipes, I was ecstatic! Now these recipes do take a bit to figure out, as there aren’t a ton of instructions AND there is a lot of old terminology that I have to google just to know how to prepare them exactly. Here’s a little old school baking knowledge I’m about to throw down.
This recipe calls for ‘sweet milk.’ Any guesses? This is what used to be the common name for ‘whole milk’ or ‘regular milk’ to distinguish it from buttermilk. For baking, all it says is to ‘bake in a slow oven.’ This references the cooking temperature. Cooking in a ‘slow oven’ is anything in the range of 150–160°C (300–325°F). Who knew? Now alas, this didn’t actually have a cooking time, so it took a lot of toothpicks to figure out just exactly how long to bake this bad boy.
Also, props to my husband who is starting to get into this. He’s learning how to cook and getting baked goods and pies out of it lol. Talk about a win freaking win. Today’s lesson was whipping egg whites to stiff peaks. His hand modeling is getting better too! Now he’s learning how to bake and in the process, getting more comfortable in the kitchen. It always makes me happy when I can help someone enjoy baking. Without further ado, I give you this weeks recipe. One of my favorites, Lemon Sponge Pie.
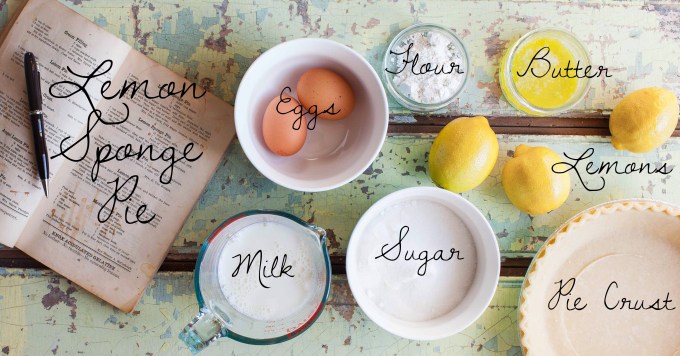
Lemon Sponge Pie
- 1 unbaked deep dish pie crust (feel free to make your own, I just happen to be lazy about pastry crusts and buy the pre-made ones)
- 1 cup sugar
- 3 rounded T flour
- 2 eggs (separated into yolks and whites)
- 1.5 cups milk (use something with fat, don’t use skim)
- 1 T melted butter
- Juice and zest of 1 lemon (I added the zest because all my favorite lemon sponge pies use the zest)
Preheat oven to 325°F. In a large bowl, mix together the sugar and butter. Add in flour, milk and yolks. Mix well. Zest and juice lemon, add to mixture. Beat egg whites until they form stiff peaks. Slowly fold egg whites into mixture. Once smooth, pour carefully into pie crust. Place in oven for a 1/2 hour at 325°F. After 1/2 hour turn oven down to 300°F and cook for 1.5-2 hours (or until top has browned and toothpick comes out cleanly). Now this is important, there shouldn’t be a lot of ‘jiggle’ left with the pie. A little is okay but the first time I attempted to take this pie out of the oven the top almost rolled right off. Be careful and don’t take it out before it’s ready. This is definitely a slow cooker and oven times may vary based on pie dish used and how well oven cooks. Let cool completely. Cut and serve. Best kept in fridge. Enjoy! Until next week. – Alysha


Alysha Yoder Photography (b) www.alyshayoderphotoblog.com
![]() www.alyshayoderphoto.com (e) alyshayoderphoto@yahoo.com (p) 610.762.7810
www.alyshayoderphoto.com (e) alyshayoderphoto@yahoo.com (p) 610.762.7810
Sunshine and Coconut
Posted on February 28, 2016
What a lovely day it has been! After a dreary, rainy, cold week of crap, today the sun was shining and a hopeful spring breeze was in the air. I’m nursing a migraine but still enjoying my time in my hometown. Who knew my mother would be the perfect photo assistant? I should have come to that conclusion on my own as she’s half the reason I’m a great cook AND she also knows what I mean when I ask her to ‘separate an egg.’ I guess it’s also a bit easier photographing with someone who’s right handed (my hubby is left handed and proves to add a level of difficulty when photographing with him).
Today we’re making a grandma staple. Gram’s loved coconut. Every year for her birthday she asked mom to make her favorite coconut cake. It always consisted of a citrus center with whipped icing covered in coconut. Coconut was her jam. She’d always have these little chocolate coconut clusters in the house hidden in her cupboard. Not to mention, macaroons. Grams has a plethora of macaroon recipes, so much that you could probably make a book just on those lol. I know her favs involved almond extract but I have yet to find that in her piles. I just grabbed one of the first ones I found, but who knows? Maybe in the future I’ll make some others and you can compare and contrast.
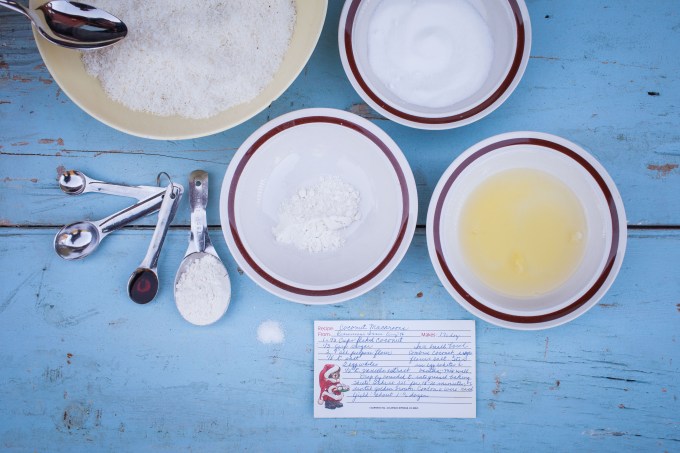
A perk about being home (other than of course getting to spend time with the fam and new puppy) is getting some farm fresh eggs from my dad’s chickens. They even have some lovely blue green eggs from their pair of Americanas. I also have a huge back porch to photograph on. Hence the lovely sunshine lit photos from today’s post. So without further ado, I give you one of gram’s MANY coconut macaroon recipes.
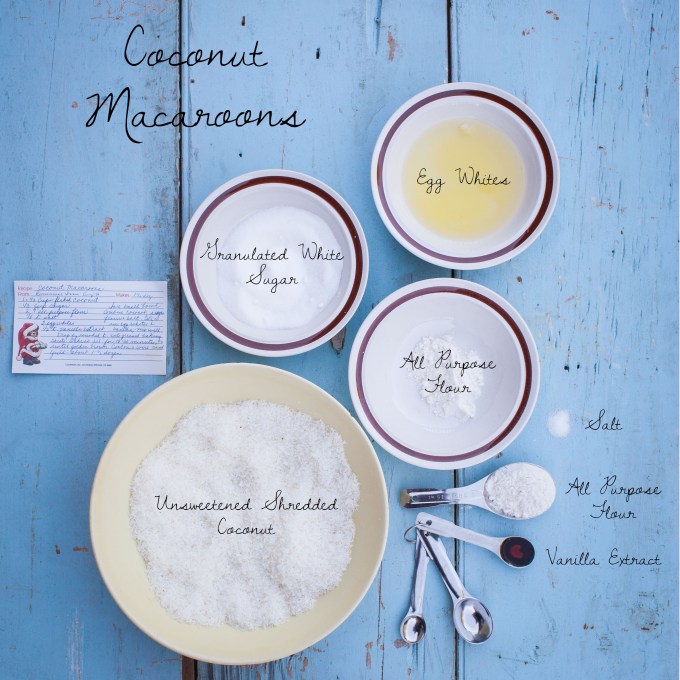
Coconut Macaroons:
Preheat oven to 325°.
- 1 1/3 cups flaked coconut (I used unsweetened shredded coconut. You could also use the sweetened stuff, just know it will make them very sweet.)
- 1/3 cup of white sugar
- 1/8 tsp salt
- 2 T all purpose flour
- 2 egg whites
- 1/2 tsp vanilla extract
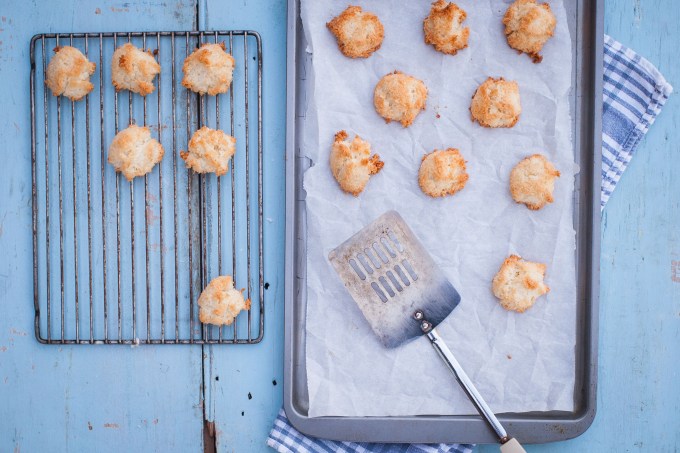
Mix together in a bowl until combined coconut, sugar, flour and salt. Stir in egg whites and vanilla. Mix well. Drop rounded teaspoons onto baking sheet (either grease or use parchment paper). Bake at 325° for 18-20 minutes or until golden brown. Cool on wire rack. Yields about 1 1/2 dozen macaroons. **Also, just a note these aren’t super sweet like a lot of macaroons since you’re using unsweetened coconut. Enjoy!


Seriously, how lovely are these eggs? I can’t get enough of them. Those orange yolks are definitely something you can’t get at the grocery store!


As mom says, “This is separating eggs the ‘old school’ way.”


Isn’t mom the best food model? Even has great hands for it. I jokingly said I’d come up every weekend just to get shots with her but now I’m half thinking that might happen.


You see this wonderfully aged and old looking cooking rack? That’s grams… or great grams. At this point it could be both but I know that at one point, gram’s used it regularly.


Aren’t these just adorable? The blues and golden browns make me want to plan a party. I certainly have gram’s party planning running through my veins. So until next week, cheers! – Alysha
Alysha Yoder Photography (b) www.alyshayoderphotoblog.com
![]() www.alyshayoderphoto.com (e) alyshayoderphoto@yahoo.com (p) 610.762.7810
www.alyshayoderphoto.com (e) alyshayoderphoto@yahoo.com (p) 610.762.7810
Popular Now


